Posts

Showing posts from August, 2012

Organising your scrapspace

Image
I'm listening to the podcast at paperclipping.com today and loving the tips and hints by Tim Holtz. Love his stuff! This topic is about techniques and how different people are set up in their space to do the messy stuff. So I thought I'd share my ideas. I have a $2 plastic tablecloth from the $2 shop covering one table space for stamping on and I have a large box that I put on my table as a spray booth for when I'm spraying or painting. This box closes up and goes under the table when not in use ..... or sometimes I leave it under the table and work there if my table is full! LOL. I have another table for my cricuit, big shot, heat gun, mini iron, hot glue gun and a mat to work on there.(It's a two tier table, cricuit on the top shelf). There are shelves above it with my cartridges, dies and glimmermists to be stored. My main table that I work at was our TV cabinet. We had one of those really large rear projection TV's and I had a capenter make u
Image
Here's a layout I did for my hubby to document how he feels for a change. I'm always doing layouts about my mum and my nana who I miss dearly.( Sorry I couldn't crop out my craft mat as the wings go off the edge of the page).  So a change of subject was definitely in order. I do try to do layouts of my mother-in-law whenever possible but I just don't have the sheer number of photos of her. (My dad gave me all the photos in the house of my mum right back to her childhood when she died) So how did I save on this layout? Well the cardboard was free.  I handmade all of the embellishments except the frame which I bought from K-Mart. I made all the flowers out of off-cuts of paper from other projects. I also made the wings in the top left hand corner by stamping on a scrap of acetate and then dusting fine  glitter over the wet ink. The little resin bird is a more expensive element but well worth it. I did save by doing the title and journalling by hand so I guess tha

Video - making rosebuds from paper

Image
Here's a quick video I did to show you how I make the rosebuds I put on my layouts. These are great because you can make them using the scraps of paper and left overs from other projects. The leaves can be made the same way too so you get a cute bud and leaves from the one punch. Enjoy... Please feel free to share with all your friends.

Free digital download - bookmarks

Image
Here's another freebie for you. This digitally designed element is a bookmark. There are a couple of different designs available in the download. These downloads are compatible with the MyMemories Suite Software.

Adore - Canvas August Class

Image
So this is the sample I have provided for this week's class at Arnolds' Scrapbooking (PH: 07 32934390). This photo was done by my photographer "Net Herbert Photography" and this one is a shot of her daughter that I've done as a canvas as a gift for her. The other photo I thought of using here was a black and white image of my mother as a little girl as I thought a vintage photo would look lovely here. In this class you'll learn distressing techniques, glimmermisting, working with ribbon, making rose buds and the larger rose, and applying texture. The photo you choose for this layout could be colour or black and white. If doing a colour photo and you want to change your accent colour from purple to something else please let the shop know ASAP... Hope you can join me for this fun class, there are still a few spots left.

My canvas clad wall

Image
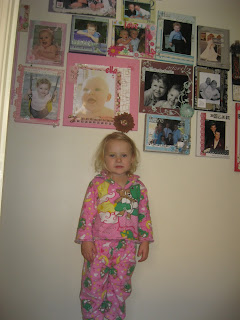
So you know how I keep promising that I'll show you a picture of all the Beyond the Page Canvases I've done on my wall? Well here are some finally!  DD2 has grown quite a bit too! All of the projects are on canvasses of different thickness to add to the artistic display. I group them in colour groupings... all the pinks together etc so the whole wall is an artistic display...... There are alot more now... too .... LOL

Miserly tips

Still can't get to my desk to do some crafting...... back pain really sux!  So instead of crafting I thought I'd share a few ideas on ways to save money on your scrapbooking. For those of you who have either been with me since the beginning of this blog or those who have read the back issues this won't be news to you but I thought it would be a good idea to revisit some of those hints and tips for new readers. I like to save on my scrapbooking by firstly setting a firm budget. If that's $10 a week or $10 a month you stick to it.  If you are forced to only spend a fixed amount you will consider your scrapbooking purchases alot more carefully! I also like to have a "just in case of extra special sale" amount tucked away. I set $60 and have that put aside in case I come across a very special sale price I just can't walk past. Cost out your pages and projects. I have to cost out my pages and beyond the page projects for my classes and have found that when

Can't Wait to Meet You

Image
O.K. so I have done my back in .... again.... this is a long term injury that I've had for 21 years now and gotta say I'm mighty over it! Anyway this means I can't get to my crafting table to do some layouts... which would normally kill me... but now that I've got digital scrapbooking again it's not a problem at all. This layout is the first page of an album I'm planning for my darling hubby. Hubby is doing some business coaching at the moment. Which I gotta say I was against. I know he loves sharing what he knows and taking a business from nothing to something... but my experience of this is always that start ups don't appreciate him. In the beginning they're all great... then somewhere along the way they forget what it is that they didn't know and totally dump on him. I've watched him get disheartened over and over again and really wasn't keen, but so far fingers crossed this client understands that she doesn't know how to do any

Free Digital Bracket Book - Blue and Brown

Image
Here's the link to the last freebie. http://www.mymemories.com/store/share_the_memories_kit_3 This Freebie is MyMemories Suite Compatible.  What does that mean??? It means that you can now load the freebie directly into your MyMemories Suite Software, and then completely customize them with any paper and embellishments that you have. If you don't have MyMemories Suite Software you can still download it but you won't be able to customize it. TIP: Remember to set your margins as small as possible on your printer to get the best size book possible!!! NOTE: Each Freebie has a different page layout, but contains a total of 6 pages for your book. Your finished book will hae 3 double sided pages when printed. TIP: You can right-click on the white guide and lock it in place to keep it from moving while you are working. Make sure this is the top layer of your project before printing.   Instead of adding the paper as a background paper, you can add it as an embell

Free Digital Kit - Bracket Book Pink

Image
So here is another free digital element I promised you. There is one more coming!  I just love a FREEBIE... hope you do to! http://www.mymemories.com/store/share_the_memories_kit_2 This Freebie is MyMemories Suite Compatible.  What does that mean??? It means that you can now load the freebie directly into your MyMemories Suite Software, and then completely customize them with any paper and embellishments that you have. If you don't have MyMemories Suite Software you can still download it but you won't be able to customize it. TIP: Remember to set your margins as small as possible on your printer to get the best size book possible!!! NOTE: Each Freebie has a different page layout, but contains a total of 6 pages for your book. Your finished book will hae 3 double sided pages when printed. TIP: You can right-click on the white guide and lock it in place to keep it from moving while you are working. Make sure this is the top layer of your project before printing.   Ins

Free Digital Bracket Book by StoryRock.

Image
So here is the free digital element I promised you. There are two more coming!  I just love a FREEBIE... hope you do to! http://www.mymemories.com/store/share_the_memories_kit_1 This Freebie is MyMemories Suite Compatible.  What does that mean??? It means that you can now load the freebie directly into your MyMemories Suite Software, and then completely customize them with any paper and embellishments that you have. If you don't have MyMemories Suite Software you can still download it but you won't be able to customize it. TIP: Remember to set your margins as small as possible on your printer to get the best size book possible!!! NOTE: Each Freebie has a different page layout, but contains a total of 6 pages for your book. Your finished book will hae 3 double sided pages when printed. TIP: You can right-click on the white guide and lock it in place to keep it from moving while you are working. Make sure this is the top layer of your project before printing.